Today we had our first Photography trip to Qutub-Minar, Delhi. It was a foggy day so we had new challenge to click good photographs...
Here are few things I observed during clicking some photographs in Foggy conditions:
- Try to use lower shutter-speed with small Aperture(Higher Aperture)... I found the subject is clearer when exposed for a long time at small Aperture rather than exposing it for less time and using big Aperture...
- Try to use the conditions for focusing on some particular part of any object... Since background is hazy, main subject will be sharp.
- These conditions give a good contrast in your photographs.
- Best Conditions to click portraits...
Apart from that here are few more learnings...
- It not always necessary to keep Light Meter at 0, I found -2,3,4 very useful to get good contrast and get more focus on the subject...
- We can also use White-Balance as a feature without bothering about light conditions to get different results which could be pleasant than the natural view :-)
....
Saturday, December 20, 2008
Wednesday, December 17, 2008
FOOD PHOTOGRAPHY : How do you photograph food and get good results?
I am gearing up for shooting food items and found some good tips about food-Photography. Here are few of them. I will try to update the same in near future...
Lighting: Treat the food you’re photographing as you would any other still life subject and ensure that it is well lit. One of the best places to photograph food is by a window where there is plenty of natural light - perhaps supported with ceiling or wall light to get rid of Shadows if you want. Sometimes shadows add very good impact in photographs. This daylight helps to keep the food looking much more natural.
Composition: Pay attention not only to the arrangement of the food itself but to the context that you put it in including container and any table settings around it. Don’t clutter the photo with a full table setting but consider one or two extra elements such as a glass, fork, flower or napkin. These elements can often be placed in secondary positions in the foreground or background of your shot.
Be Quick: Food doesn’t keep it’s appetizing looks for long so as a photographer you’ll need to be well prepared and able to shoot quickly after it’s been cooked before it melts, collapses, wilts and/or changes color. This means being prepared and knowing what you want to achieve before the food arrives. One strategy that some use is to have the shot completely set up with props before the food is ready and then to substitute a stand-in plate to get your exposure right. Then when the food is ready you just switch the stand-in plate with the real thing and you’re ready to start shooting.
Style It: The way food is set out on the plate is as important as the way you photograph it. Pay attention to the balance of food in a shot (color, shapes etc) and leave a way into the shot (using leading lines and the rule of thirds to help guide your viewer’s eye into the dish). One of the best ways to learn is to get some cook books to see how the pros do it.
Enhance It : Have some vegetable oil on hand and to brush it over food to make it glisten in your shots. :-)
Angle for your Shot: A mistake that many beginner photographers make is taking shots that look down on a plate from directly above. While this can work in some circumstances - in most cases you’ll get a more better shot by shooting from down close to plate level (or slightly above it).
Colors : Colors are very important. Food should neither look dull nor extra-colored...
Thursday, December 4, 2008
How Angle of View, Depth of Field & Perspective changes with change in Focal Length
Lets discuss a bit about relation of lenses with the focal lengths supported by them. Basically we have three basic lens types, determined by the focal length (measured in millimeters) of the lenses:
Normal. A normal lens shows most accurately what a normal human eye will see. 50mm is a typical normal focal length. The 50mm is the most popular and versatile lens. The quality is excellent while also being inexpensive. It is smaller and lighter, and the aperture allows photographs to be taken in low-light situations.
Telephoto. A telephoto lens brings the background closer. Longer-than-normal focal lengths such as 70mm and 300mm are typical for a telephoto lens. Since a telephoto lens will bring the subject up close, it is popular for sports photography.
Wide. A wide lens captures a wider expanse of the background than what the human eye will see. Shorter-than-normal focal lengths such as 24mm and 35 mm are typical for a wide lens. Wide lenses are popular for landscape photography and large group shots.
We also categorize lenses in two broad categories Fixed focal length & Zoom Lenses. Fixed/Block lenses are considered as quality lenses as compared to zoom lenses because Zoom lenses have optical errors due to extra lenses...
***How Angle of View, Depth of Field & Perspective changes with change in Focal Length***
ANGLE OF VIEW:
Increases with decrease in Focal Length (>46 Degree)<<<<-----50MM (46 Degree) ------>>>> Decreases with increase in Focal Length(< 46 Degree)
DEPTH OF FIELD:
Increases with decrease in Focal Length<<<<-----50MM ------>>>> Decreases with increase in Focal Length
PERSPECTIVE :
Exaggerated Perspective<<<<-----50MM ------>> 80MM(Normal)----->> Diminished
***
- Normal Lens : 46 dgree angle of view : 50 MM
- <46 : Telephoto Lenses : Icreases DOF : Greater than 50 mm
- >46 : Wide-Angle Lenses : Decreases DOF : Less than 50 mm
-
Monday, November 24, 2008
Exposure Conpensation
Exposure compensation is a technique for adjusting the exposure indicated by a photographic exposure meter, in consideration of factors that may cause the indicated exposure to result in a less-than-optimal image. Factors considered may include unusual lighting distribution, variations within a camera system, filters, non-standard processing, or intended underexposure or overexposure. Cinematographers may also apply exposure compensation for changes in shutter angle or film speed, among other factors.
Generally used in Aperture and Shutter Priority Modes...
In photography, some cameras include exposure compensation as a feature to allow the user to adjust the automatically calculated exposure. Compensation can be either positive (additional exposure) or negative (reduced exposure), and is commonly available in third- or half-step[1] increments, usually up to two or three steps in either direction; some digital cameras allow a greater range. Camera exposure compensation is commonly stated in terms of exposure value (EV); 1 EV is equal to one exposure step.
LOOK for +/- sign on your Camera Body.. If not able to locate, try to check Menu or Function Controls available in some cameras.
Monday, November 17, 2008
Light Meter in SLR Cameras
Knowing how your digital camera meters light is critical for achieving consistent and accurate exposures. Metering is the brain behind how your camera determines the shutter speed and aperture, based on lighting conditions and ISO speed.
Understanding these can improve one's photographic intuition for how a camera measures light.
Light Meters:
- Reflected Light Meters
- Incident Light Meters
...
Normally you can see an Exposure Scale in your cameras. Most of the times when we start using new SLR cameras, it takes time to estimate the right exposure (Aperture + Shutter Speed) in different light conditions. Light Meter Scale is dem=noted by a line having zero value in middle & -ve values on right side. +ve values are on left side and denotes over-exposed. This does not mean that zero is the ideal Exposure. This needs to be estimted by photographer becuase every Ligt Meter has different algorithm to judge light coming to the lens. So it might be the case and -2 is ideal exposure in sunlight (It's just an example).
How to try:
- Go to manual mode of your camera
- Set some value of Aperture (Whtever you want)
- Check the value in Camera Light Meter
- Now click photograph at some Shutterspeed
- Check how it can be improved.
- Now try this again n again with different Shutter sppeds and also check Light Meter regularly.
You can also try the same thing with fixed Shutterspeed. Remember, always check Light meter when you change Aperture or Shutter-speed. Over the time it will give you an idea about Exposure values for different light conditions.
Thursday, November 6, 2008
My First Photography class
Today I had my first photography class where we discussed some basics on Photography and basic information about type of Cameras.
Diaphragm: A stop in the light path of a lens, having an aperture that regulates the amount of light that passes. These are actually blades which are moved to achieve a particular Aperture Value.
Shutter : Overlapping Curtains behind Lens to control the passage of light towards Sensor.
Types of Cameras:
1. Simple Viewfinder Cameras:
- Viewfinder: A viewfinder is what the photographer looks through to compose, and in many cases to focus, the picture.
2. Rangefinder Cameras: A rangefinder camera is a camera fitted with a rangefinder: a range-finding focusing mechanism allowing the photographer to measure the subject distance and take photographs that are in sharp focus. Most varieties of rangefinder show two images of the same subject, one of which moves when a calibrated wheel is turned; when the two images coincide and fuse into one, the distance can be read off the wheel. Older, non-coupled rangefinder cameras display the focusing distance and require the photographer to transfer the value to the lens focus ring; cameras without built-in rangefinders could have an external rangefinder fitted into the accessory shoe. Earlier cameras of this type had separate viewfinder and rangefinder windows; later the rangefinder was incorporated into the viewfinder. More modern designs have rangefinders coupled to the focusing mechanism, so that the lens is focused correctly when the rangefinder images fuse.
- Used these days : Leica ...
- Compact Cemaras
- Coupled range finder (Prizm) is used to reflect the view from lens for user eyes during capture process.
- Photographer needs to adjust the lens to get sharp image through these cameras.
- No noise, thats why used by Street Photographers
- Manual Adjustment Lenses are used in these kind of cameras
3. Twin-Lens Cameras: A twin-lens reflex camera (TLR) is a type of camera with two objective lenses of the same focal length. One of the lenses is the photographic objective (the lens that takes the picture), while the other is used for the waist-level viewfinder system. In addition to the objective, the viewfinder consists of a 45-degree mirror (the reason for the word reflex in the name), a matte focusing screen at the top of the camera, and a pop-up hood surrounding it. The two objectives are connected, so that the focus shown on the focusing screen will be exactly the same as on the film. However, many inexpensive TLRs are fixed-focus models. KNOW MORE...
- Paramender is used to overcome Parallax
4. Single Reflex Cameras (SLR): The single-lens reflex (SLR) camera uses an automatic moving mirror system which permits the photographer to see exactly what will be captured by the film or digital imaging system, as opposed to non-SLR cameras where the view through the viewfinder could be significantly different from what was captured on film. KNOW MORE...
- Mirror goes up when shoot button clicked.
- Mirror is used before shoot to show the view in viewfinder. So in this case light comes through lens and same view is also passed to Viewfinder.
5. View Cameras: It comprises a flexible bellows which forms a light-tight seal between two adjustable standards, one of which holds a lens, and the other a viewfinder or a photographic film holder.
The bellows is a flexible, accordion-pleated box, which encloses the space between the lens and film, and has the ability to flex to accommodate the movements of the standards. KNOW MORE...
- Huge Cameras
- Big film/Digital back sheet
- Always mounted on stand
- Lenses can be tilted
- Shutter is part of lens
- Companies like Sinar produces this kind of cameras. Check Google for other brands.
------------------------------------------------------------------------------------------------
* SMALL FORMAT Cameras:
- 35mm Format film cameras <36mm*24mm> 24+11mm = 35mm (Including perforation of 11 mm)
- 24mm*16mm sensors in small format digital cameras: Small format Digital SLRs : APS-C Format (Advanced Photo System) : D200,
- We should not compare Digtal Camera quality with Film cameras because of different reasons???
* LARGE FORMAT CAMERAS:
- 6'*9' inches & 8'*12' inches
- Sinar Brand cameras
* MEDIUM FORMAT CAMERAS
- 120 format, 220 format, 645 format (greater than 24mm*36mm frames)
- Mamiya (Japanese), Hasselblad
- 645 = 6*4.5 cm by Mamiya
Checkout Nikon D3 & Nikon D700
*** Today I saw a lens with Aperture Controls... Need to know about the details ***
Diaphragm: A stop in the light path of a lens, having an aperture that regulates the amount of light that passes. These are actually blades which are moved to achieve a particular Aperture Value.
Shutter : Overlapping Curtains behind Lens to control the passage of light towards Sensor.
Types of Cameras:
1. Simple Viewfinder Cameras:
- These Cameras have Parallax Error (Parallax is an apparent displacement or difference of orientation of an object viewed along two different lines of sight, and is measured by the angle or semi-angle of inclination between those two lines. KNOW MORE... )
2. Rangefinder Cameras: A rangefinder camera is a camera fitted with a rangefinder: a range-finding focusing mechanism allowing the photographer to measure the subject distance and take photographs that are in sharp focus. Most varieties of rangefinder show two images of the same subject, one of which moves when a calibrated wheel is turned; when the two images coincide and fuse into one, the distance can be read off the wheel. Older, non-coupled rangefinder cameras display the focusing distance and require the photographer to transfer the value to the lens focus ring; cameras without built-in rangefinders could have an external rangefinder fitted into the accessory shoe. Earlier cameras of this type had separate viewfinder and rangefinder windows; later the rangefinder was incorporated into the viewfinder. More modern designs have rangefinders coupled to the focusing mechanism, so that the lens is focused correctly when the rangefinder images fuse.
- Used these days : Leica ...
- Compact Cemaras
- Coupled range finder (Prizm) is used to reflect the view from lens for user eyes during capture process.
- Photographer needs to adjust the lens to get sharp image through these cameras.
- No noise, thats why used by Street Photographers
- Manual Adjustment Lenses are used in these kind of cameras
3. Twin-Lens Cameras: A twin-lens reflex camera (TLR) is a type of camera with two objective lenses of the same focal length. One of the lenses is the photographic objective (the lens that takes the picture), while the other is used for the waist-level viewfinder system. In addition to the objective, the viewfinder consists of a 45-degree mirror (the reason for the word reflex in the name), a matte focusing screen at the top of the camera, and a pop-up hood surrounding it. The two objectives are connected, so that the focus shown on the focusing screen will be exactly the same as on the film. However, many inexpensive TLRs are fixed-focus models. KNOW MORE...
- Paramender is used to overcome Parallax
4. Single Reflex Cameras (SLR): The single-lens reflex (SLR) camera uses an automatic moving mirror system which permits the photographer to see exactly what will be captured by the film or digital imaging system, as opposed to non-SLR cameras where the view through the viewfinder could be significantly different from what was captured on film. KNOW MORE...
- Mirror goes up when shoot button clicked.
- Mirror is used before shoot to show the view in viewfinder. So in this case light comes through lens and same view is also passed to Viewfinder.
5. View Cameras: It comprises a flexible bellows which forms a light-tight seal between two adjustable standards, one of which holds a lens, and the other a viewfinder or a photographic film holder.
The bellows is a flexible, accordion-pleated box, which encloses the space between the lens and film, and has the ability to flex to accommodate the movements of the standards. KNOW MORE...
- Huge Cameras
- Big film/Digital back sheet
- Always mounted on stand
- Lenses can be tilted
- Shutter is part of lens
- Companies like Sinar produces this kind of cameras. Check Google for other brands.
* SMALL FORMAT Cameras:
- 35mm Format film cameras <36mm*24mm> 24+11mm = 35mm (Including perforation of 11 mm)
- 24mm*16mm sensors in small format digital cameras: Small format Digital SLRs : APS-C Format (Advanced Photo System) : D200,
- We should not compare Digtal Camera quality with Film cameras because of different reasons???
FULL FRAME CAMERAS:
- Nikon D3, D700
- Digital cameras with sensor 24mm*36mm
- Nikon D3, D700
- Digital cameras with sensor 24mm*36mm
* LARGE FORMAT CAMERAS:
- 6'*9' inches & 8'*12' inches
- Sinar Brand cameras
* MEDIUM FORMAT CAMERAS
- 120 format, 220 format, 645 format (greater than 24mm*36mm frames)
- Mamiya (Japanese), Hasselblad
- 645 = 6*4.5 cm by Mamiya
Checkout Nikon D3 & Nikon D700
*** Today I saw a lens with Aperture Controls... Need to know about the details ***
Sunday, November 2, 2008
Digital Camera Comparison - MegaPixels
What are those megapixels anyway? Digital cameras capture photographs on image sensors, rather than on film.
The megapixel count is how many individual ‘dots’ are there on that image sensor, making up the photograph. 3 Megapixel cameras have 3 million dots on their sensors. 4 Megapixel cameras have 4 million dots . . . and so on.
You might assume then, that those extra million pixels will improve your digital photography. Not by much it won’t!
You would have to jump from a 3 megapixel to a 6 megapixel to really make a difference to your digital photography. (As compared to moving from 3MP to 4 MP... )
The reason I’m explaining this? When you are making your digital camera comparison, standing in the shop, ready to hand over your money – don’t concern yourself with whether camera ‘A’, has 1 million more pixels than camera ‘B’. It won't make a huge difference.
Maybe someday you'll want to print them out:
One day you may well decide to print the results of your digital photography. Most people do at some point, and therefore you’ll need to think carefully about the number of pixels when making your digital camera comparison.
The holy grail for printing is a resolution of 300 dots per inch. Click if you want to read more about image resolution. You will still get a good print from around 240 dots per inch though.
What does this mean for you in terms of megapixels? Have a look at the relationship below which shows how big a print you can realistically make:
MEGAPIXEL >>> QUALITY PRINT UPTO THIS SIZE
2MP >>> 6"*4"
3MP >>> 7"*5"
6MP >>> 10"*8"
8MP >>> 12"*10"
The megapixel count is how many individual ‘dots’ are there on that image sensor, making up the photograph. 3 Megapixel cameras have 3 million dots on their sensors. 4 Megapixel cameras have 4 million dots . . . and so on.
You might assume then, that those extra million pixels will improve your digital photography. Not by much it won’t!
You would have to jump from a 3 megapixel to a 6 megapixel to really make a difference to your digital photography. (As compared to moving from 3MP to 4 MP... )
The reason I’m explaining this? When you are making your digital camera comparison, standing in the shop, ready to hand over your money – don’t concern yourself with whether camera ‘A’, has 1 million more pixels than camera ‘B’. It won't make a huge difference.
Other things to consider about the number of megapixels:
There are two things you should consider when making your digital camera comparison:
- How important is picture quality to you?
- How will you view your photographs, computer screen or print?
Picture quality:
This is determined by more than just the number of pixels. In fact, some cameras with a lot of megapixels produce worse pictures than cameras with fewer. The reason is twofold:
First, the more pixels crammed onto an image sensor, the smaller each individual pixel must be. The pixels are so small it’s difficult to accurately record the light hitting them. The results are what we call in digital photography ‘noise’ and ‘purple fringing’.
Second, the quality of lenses. The best sensor in the world will be useless without a good lens to focus light onto it. At the same time, a lesser sensor, but with a good lens in front of it is capable of taking very good photographs. Read about the importance of brand when making your digital camera comparison.
How will you view your photographs?:
If you plan to use digital photography to take photographs that you will only ever view on screen, then you won’t need many pixels. A standard 15” monitor will be 1024 pixels wide, and 768 pixels high. The total is only 0.8 Megapixels. No point buying a 6 megapixel camera if you only need 0.8 of them!
Maybe someday you'll want to print them out:
One day you may well decide to print the results of your digital photography. Most people do at some point, and therefore you’ll need to think carefully about the number of pixels when making your digital camera comparison.
The holy grail for printing is a resolution of 300 dots per inch. Click if you want to read more about image resolution. You will still get a good print from around 240 dots per inch though.
What does this mean for you in terms of megapixels? Have a look at the relationship below which shows how big a print you can realistically make:
MEGAPIXEL >>> QUALITY PRINT UPTO THIS SIZE
2MP >>> 6"*4"
3MP >>> 7"*5"
6MP >>> 10"*8"
8MP >>> 12"*10"
How SLR Cameras are better than Compact Cameras
SLRs are big, heavy and expensive when compared to compact digital cameras.
So wouldn’t you be better off with a compact? Well, not necessarily.
This page outlines the key differences between the two, and will hopefully show you that there are good reasons why keen photographers carry bulky SLRs around with them!
It’s difficult to pin down just one advantage of digital SLR cameras, because there are so many of them. Here are some them:
1. ADVANTAGE OF DIGITAL SLR CAMERAS: PHOTO QUALITY
Many compact cameras these days have a huge number of megapixels. More in fact than a lot of digital SLRs. You could be forgiven for thinking that this must mean better photos?
Unfortunately you’d be wrong. More megapixels doesn’t equal better quality. The problem is the image sensors on compact digital cameras are just too small. When 10 million pixels are crammed onto them the individual photosites on the sensor are too small, and too close together.
This closeness and their size means they suffer from interference. When you look at photos closely they have speckles on them. This is called digital noise. The effect is worse in low light.
The lack of noise in photos is one advantage of digital SLR cameras when it comes to picture quality, but not the only one. Another advantage is SLRs’ ability to shoot in RAW mode.
By shooting in RAW mode the camera captures more detail, and allows for far more flexibility when it comes to editing photos later on.
Overall photo quality is one advantage of digital SLR cameras over compact digital cameras.
2. ADVANTAGE OF DIGITAL SLR CAMERAS: SPEED
When I talk of “speed”, I am referring to the speed of camera operation.
There are a number of factors that contribute to the overall speed of a digital camera.
First, there is the speed of focusing. When composing a shot, cameras clearly need to focus first.
In any given situation a digital SLR camera will focus on the subject faster than a compact digital camera.
This speed advantage of digital SLR cameras is even more obvious in low light conditions.
Second, there is the frame rate. Frame rate is the number of frames per second a camera can take.
Digital SLR cameras are usually good at taking a sequence of photos of a moving subject; and will be able to keep re-focussing as the subject moves too. Have a look at the photo below to see the effect.
Another element of speed is how long the camera takes to switch on. With a digital SLR, especially the more recent Nikons and Canons, as soon as you turn the switch, it’s on. That’s it. No lens to extend. No motor whirring. It’s just on, in an instant.
If you are interested in capturing a moment, this “on” speed might be the difference between getting your shot, and missing out. This is a definite advantage of digital SLR cameras.
A final note on the speed of operation is the speed of zooming. When a compact camera zooms the motor whirrs and the lens slowly extends. Digital SLRs don’t work in this motorised way. You zoom the lens by turning the lens barrel. This gives you an instant zoom.
With this type of manual zooming it is also easier to nudge the zoom in or out a little if you need to – just a little flick of the wrist is all that’s needed, and you’re there.
Speed of operation is therefore a clear advantage of digital SLR cameras over compact digital cameras.
3. ADVANTAGE OF DIGITAL SLR CAMERA: FLEXIBILITY
With a digital SLR you have the choice of hundreds of different lenses and a huge range of flash options.
Why should you care about the lenses, after all, compact digital cameras come with good zoom lenses, don’t they? Well, yes, they do. But the quality of the lens is poor in relation to the lenses available to digital SLRs, and there is no comparison when it comes to aperture.
Lenses on digital SLRs have wide apertures, much wider than the zoom lenses on compacts. This provides two advantages of digital SLR cameras over compacts.
First, this means that shutter speeds can be faster because more light can enter the camera.
Second, it means you are able to control the depth of field in your photos. A shallow depth of field is particularly flattering in portrait photography, and is impossible to achieve with a compact camera because the lenses just aren’t up to the job.
And then there’s the flexibility of the flash on offer. The small flash on top of compact cameras is no match for the powerful flashguns that are available for digital SLRs.
Not only are flashguns more powerful, but they also able to “bounce” the flash off of ceilings and walls. This diffuses the flash, and eliminates red eye.
Friday, October 17, 2008
How To Take Better Photographs Of People
Subject Placement. The biggest mistake many photographers make is to try to shoot a person's whole body, head to toe. Don't attempt this, unless clothes are important (such as a uniform). Instead, focus on the face. The eyes and mouth are the most important features, so start there and work out until you have just enough to represent the individual(s).
Lighting. A standard lighting technique is to position yourself so the sun is behind you and to one side. This arrangement will shine light on the subject's face, while the slight angle will produce shadows to illuminate form. A better approach is to put your subject in a shady area with a shadowed background. Unlike the human eye, photographic film can't easily handle bright areas and dark shadows, as in direct sunlight, so use the shade for a narrow tonal range. Overcast days are usually best for portraits.
Lenses. Use a long lens such as 135mm - the 'people' lens. A wide-angle distorts the face, although it can be effective for parties. Find a simple, mid-toned background and use a wide aperture to throw it out of focus. Center the eyes in the shot, not the head, to provide balance in the shot. When photographing children, crouch down so that you're shooting at their eye-level.
Setting The Scene. Try to set-up your camera ahead of time rather than making people wait. Help relax your subjects by engaging them in conversation. Get them to laugh or smile with a joke from the day. Finally, be sure to put yourself in the shot ;-)
-- that's what the self-timer is for!
Thursday, September 25, 2008
Common Mistakes
BLURRY PHOTOS:
Blurry photos are usually the result of camera shake. The simplest way to remedy this problem is to buy and use a good, sturdy tripod. If you can't shoot with a tripod, remember to use a faster ISO on digital cameras or faster film on film cameras. This allows you to increase your shutter speed. The faster the shutter speed, the less likely you are to suffer from camera shake. A rule of thumb for handholding is to use a shutter speed that is 1/lens focal length or faster. In other words, if you're shooting a 200mm lens, you need 1/200th second or faster. Don't forget to compensate if you shoot digitally. If you use a 200mm lens on a Nikon D100, it is the equivalent focal length of 300mm, so you will need to shoot at 1/ 300th of a second if you want to handhold.
UNDEREXPOSED PICTURES :
Underexposure often results from letting the camera make all the exposure decisions. Remember, the camera's meter wants everything to be medium (or gray.) If you do use the auto exposure functions, one common mistake comes from using auto exposure compensation and then forgetting you've done so. Make sure that you get enough light into the scene before you press the shutter.
OVEREXPOSED PICTURES:
Like underexposure, overexposure can result from letting your camera make all the decisions. With slide film, overexposure means blown out highlights and that means lost information. Basing your exposure on shaded or dark areas and letting the camera set the exposure is a formula for overexposed slides. Look for something medium to meter from or, better yet, meter the highlights.
RED EYE:
This is a common problem resulting from on-camera flash. Move your flash off- axis. Use a flash bracket and connecting cord. You can also bounce the flash off a ceiling or wall. You can also use remote flash triggers to fire a flash that is mounted on a stand or anywhere else, as long as it is not on camera.
LENSE FLARE:
Flare occurs when direct light hits the front element of the lens and light starts bouncing around inside the lens. This causes the light to reflect off all the elements. This can reduce contrast and make your pictures look "hazy". Most commonly, it results in a series of round highlights across your image. Be sure to use a lens hood to help prevent this. Sometimes you'll need more than a lens hood. Try using your hand or a hat to shade the lens. If someone is with you, ask him or her to stand so that they cast a shadow on the lens.
Sometimes it's hard to detect lens flare when looking through the viewfinder; using your depth of field preview button will make this easier.
Wednesday, September 17, 2008
Photography: The Rules of Composition
Composition is the combining of distinct parts or elements to form a whole. In photography that thought is very important in taking good pictures. The following guidelines are just to be thought about though, it is not necessary to try to use them with every picture you take or there wouldn't be any creativity in your work. Once you learn these rules and strategies you will be more prepared to find great picture spots and opportunities.
Before you just step up and take a picture you should consider what you want your viewers to look at and how you should display main points of interest. You should ask yourself, what is the main subject? What angle should the light be hitting in my picture? Is there anything that could accentuate the main subject? Where should the main subject be in the frame? These are all important things you should consider, but that doesn't necessarily mean you need to follow the rules exactly.
The Rule of Thirds has been used for centuries and is probably the most important of all the composition techniques. The Rule of Thirds means that the frame can be divided into three horizontal sections and three vertical sections and therefore, where the horizontal and vertical lines intersect makes an ideal location for the more important parts of your picture. By locating your main subject at one of the four intersections you give the subject more emphasis than if it was right smack in the middle of the picture. This is also a good technique if you have more than one important subject, the intersections can still work even if there's a subject on more than one. The divisions can also be helpful in setting up a picture, they can for example, help you determine how much horizon you want. Most famous photographs or paintings in the world today have the rule of thirds applied to them in some way.
Simplicity is the method of keeping the information in a photograph relatively simple. If your main subject is close, then your background should be very simple to avoid distractions. You should try to keep everything not important much less interesting than what's important in the frame. Especially avoid lines or objects that lead the eye away from the subject.
Framing is the tactic of using natural surroundings to add more meaning to your subject. It could be anything such as bushes, trees, a window, or even a doorway. In the process of doing this you need to be careful that you don't only focus on what's framing your subject. Make sure you focus on the main subject, and also it is a good idea to use a narrow aperture (high f/stop) to achieve a high depth-of-field. It also wouldn't hurt if the part of the picture framing the subject was darker so make sure you take your light reading on the main subject.
Texture can add a significant amount of interest in any picture. When people see texture in pictures they start imagining what it feels like to touch what's in the picture. Texture is a good idea when your taking pictures of rocks, walls, surfaces, someone's hands, or leaves. In order to make a picture reveal a texture you must make sure the light is coming almost exactly from the side of the surface so it creates shadows in places key places.
Leading Lines are used to lure the eye deeper into a picture or to an important subject. Straight, curved, parallel, or diagonal lines are all good at promoting interest. Good examples could be roads, rivers, streams, bridges, branches, or fences but there are endless things that could be used.
Colors are what add heart and emotion to your pictures. Certain color configurations can inspire awe and amazement in onlookers. Colors can be used to add all sorts of accents and effects, but you must be careful to not draw attention away from the main subject.
It might not be a bad idea to keep these key terms with you when you practice taking pictures. The best way to learn and improve your composition is just lots of practice and experimenting.
Tuesday, September 16, 2008
Use of Light in Photography
- The angle of light should be taken into careful consideration whenever you feel like you want to create a specific effect. Shadows can be very powerful when cast over half of someone's face.
- The effect of rays of light indoors and outdoors. can be very spectacular. A brilliant part of some great photographs is the ability to see actual rays of light. Whether it be in the setting of a brilliant sunset, light pouring through a window or from artificial lights it can look very impressive. Usually the only way to obtain something like this is a narrow aperture (high f/stop) and a very slow shutter speed.
- Silhouettes are another interesting example of using light. The way to create a silhouette is to have significantly brighter light coming from behind the subject. In doing this it is important to take your camera light reading off of the background instead of the subject in order for the camera to adjust for an exposure based on the backlight. If you do this the subject will be successfully underexposed
If you keep experimenting with different ways of using light you will find that you can get very interesting results. The longer the exposure, the more fascinating the results with light most of the time
Rule of Thirds...
The rule of thirds is a compositional rule of thumb in photography and other visual arts such as painting and design.[1] The rule states that an image can be divided into nine equal parts by two equally-spaced horizontal lines and two equally-spaced vertical lines. The four points formed by the intersections of these lines can be used to align features in the photograph. Proponents of this technique claim that aligning a photograph with these points creates more tension, energy and interest in the photo than simply centering the feature would
Know MOre
Know MOre
Some more tips for Low Light/Night Photography
The use of light in a photograph can be the deciding factor of whether that picture will be spectacular or terrible. When you use your camera to automatically chose aperture and shutter speed, what your camera is actually doing is using the built in light meter and measuring how much light is being reflected to the camera.
But that doesn't mean that's all there is to it. You should also think about the angle of the light entering the frame, what kind of shadows you want, and whether you want to use fill-in-flash (using flash to light the subject if you have a really bright background). If you are shooting at night you can create all sorts of cool effects like lights in motion or pictures with moonlight.
Here are few more tips about Night/Low-Light Photography:-
- Adding some foreground item to frame and then shooting which will create a greater depth to the picture, and most of the time make the results look even more brilliant.
- Self-timer should also be used to eliminate any shake.
- When photographing sunsets you should not only include foreground items but use the rule of thirds, specifically the horizontal section of thirds so you get a good perspective on the scene.
- When you take the light reading with your camera make sure you don't point it directly at the sun, if you do your picture will be underexposed.
- When trying to photograph fireworks or lightning you will definitely need a tripod. There are different techniques to doing this but probably the easiest is just setting your camera up pointed at a good range of sky and setting the aperture narrow (high f/stop) and setting the shutter speed very long or just by using the "bulb" function of shutter speed (the "bulb" function allows you to open the shudder and close it manually, so its not on a set time). Many people try this in different ways so its just good to experiment and try different things.
Tuesday, September 9, 2008
How White Balance settings improve Picture Quality?
White balance (WB) is the process of removing unrealistic color casts, so that objects which appear white in person are rendered white in your photo. Proper camera white balance has to take into account the "color temperature" of a light source, which refers to the relative warmth or coolness of white light. Our eyes are very good at judging what is white under different light sources, however digital cameras often have great difficulty with auto white balance (AWB). An incorrect WB can create unsightly blue, orange, or even green color casts, which are unrealistic and particularly damaging to portraits. Performing WB in traditional film photography requires attaching a different cast-removing filter for each lighting condition, whereas with digital this is no longer required. Understanding digital white balance can help you avoid color casts created by your camera's AWB, thereby improving your photos under a wider range of lighting conditions.
Normally our eyes compensate for lighting conditions with different color temperatures. A digital camera needs to find a reference point which represents white. It will then calculate all the other colors based on this white point. For instance, if a halogen light illuminates a white wall, the wall will have a yellow cast, while in fact it should be white. So if the camera knows the wall is supposed to be white, it will then compensate all the other colors in the scene accordingly.
Normally our eyes compensate for lighting conditions with different color temperatures. A digital camera needs to find a reference point which represents white. It will then calculate all the other colors based on this white point. For instance, if a halogen light illuminates a white wall, the wall will have a yellow cast, while in fact it should be white. So if the camera knows the wall is supposed to be white, it will then compensate all the other colors in the scene accordingly.
Tuesday, August 26, 2008
Play with Light
Create abstract images
Use your camera's limitations to your advantage and create attractive abstract images. You'll truly be drawing with light. Things like camera shake and extended shutter times can be used to generate eye-catching effects and photographs that go beyond the mere representation of reality.
Take pictures at sunset
Sunset photographs can be spectacular, but despite all the colours in the sky, fading sunlight is often not strong enough for sharp images. Use a tripod and extended shutter times for better pictures.
Use the sunset as a backlight. Objects and persons photographed in front of a sunset will appear in shadow. A dark silhouette against the blazing colours of the fading sun creates a dramatic contrast.
Explore the meaning of light
Light itself is a fascinating subject. So, why not take pictures of light? Neon signs, lit-up storefronts, streetlamps and headlights are just some of the lights you can photograph. You can even photograph a fireworks display or a lit-up Christmas Tree for a festive image.
Night/Low-Light Photography: Experiment with different settings
Once you're comfortable with your camera's manual controls (or even with its built-in night mode), you can further explore the challenge of low-light photography by trying some of the following:
Use reflections to your advantage
Some of the most spectacular night photography involves the use of reflections. Reflections not only give you more light to work with, but they also add visual interest to your photographs. Look for reflections on bodies of water, snow banks, windows, mirrors, cars, etc.
Blaze a trail
Create trails of light with long shutter times and small apertures. Use your camera's longest shutter time or your camera's bulb mode (if available). Bulb mode lets you keep your shutter indefinitely on some cameras, or for periods of up to 5 or 10 minutes, on others.
Use a tripod
A great way to improve your night photography is to use a tripod. A tripod will keep your camera steady and will give you further control over exposure by reducing camera shake, thus enabling you to keep your shutter open longer. Tripods come in several varieties, including table-top models that you can fit in your pocket.
If your camera has a remote control, use it in conjunction with your tripod to further eliminate camera shake.
Look for light
Even at night, you're surrounded by light, especially in cities. Streetlights, traffic lights, neon signs, office interiors and car headlights are just some of the types of light you'll find at night. And let's not forget moonlight and starlight. Dealing with the variety of available light is one of the challenges of shooting at night. With practice, you'll learn what settings work best with specific types of light.
Use reflections to your advantage
Some of the most spectacular night photography involves the use of reflections. Reflections not only give you more light to work with, but they also add visual interest to your photographs. Look for reflections on bodies of water, snow banks, windows, mirrors, cars, etc.
Blaze a trail
Create trails of light with long shutter times and small apertures. Use your camera's longest shutter time or your camera's bulb mode (if available). Bulb mode lets you keep your shutter indefinitely on some cameras, or for periods of up to 5 or 10 minutes, on others.
Put your camera on a tripod and position yourself at the corner of a busy intersection or on an overpass over a busy highway. Press the shutter release and wait. As cars pass by, they will create streaks of light that travel across your picture.
Tips for Night OR Low-Light Photography
Tip 1:
Familiarize yourself with how your camera works in daylight so you don't have to fumble for the controls in the dark.
Tip 2:
Use your optical viewfinder to reduce shake by steadying the camera against your face.
Tip 3:
Digital cameras are great for astronomical photography. You can buy special adapters that let you connect your camera to a telescope. (Some telescopes are sold with such an attachment.) Some cameras, like the Canon 20Da are made specifically for astrophotography.
Night & LOw Light Photography
Yesterday I saw an exhibition of Anindo Ghosh at IHC, Delhi. I am really impressed by his work in the field of Night Photography. Check out his Pics
Night photography presents a special set of challenges because photography is based upon capturing light. In fact, the word photography comes from the Greek and literally means drawing with light. Whether you're dealing with film or digital, your camera needs light to create images so, the less light there is, the more difficult it is to create an image. But it's not impossible.
Night photography requires you to flex your photographic muscles and push the limits of your camera equipment. Although most cameras have a night mode that improves your chances of taking better pictures in low light conditions, it is an automatic setting that cannot account for all the variations that you may encounter while shooting at night. That's why you have to use your camera's advanced functions, such as aperture and shutter control, white balance adjustment, ISO adjustment, bulb mode, and even a remote control (if you've got one). You'll also want to use a tripod or find other creative ways to keep your camera steady.
Here are some things you can do to improve your nighttime and low-light photography:
Use exposure compensation
The combination of the shutter speed, aperture and ISO setting is called exposure and determines the total amount of light and that your camera can capture, as well as its ability to freeze motion.
To make the most of your night photography:
Compact Cameras
A camera with a manual shutter and ISO controls. (The longer the maximum shutter time and the higher the ISO number, the better.)
Digital SLRs
A shutter release cable or remote control to prevent camera shake caused by pressing the shutter release button.
Accessories
A tripod to keep your camera steady during prolonged exposures.
Night photography presents a special set of challenges because photography is based upon capturing light. In fact, the word photography comes from the Greek and literally means drawing with light. Whether you're dealing with film or digital, your camera needs light to create images so, the less light there is, the more difficult it is to create an image. But it's not impossible.
Night photography requires you to flex your photographic muscles and push the limits of your camera equipment. Although most cameras have a night mode that improves your chances of taking better pictures in low light conditions, it is an automatic setting that cannot account for all the variations that you may encounter while shooting at night. That's why you have to use your camera's advanced functions, such as aperture and shutter control, white balance adjustment, ISO adjustment, bulb mode, and even a remote control (if you've got one). You'll also want to use a tripod or find other creative ways to keep your camera steady.
Here are some things you can do to improve your nighttime and low-light photography:
Adjust your camera's ISO setting
The ISO setting determines your camera's sensitivity to light. The higher the ISO number, the more sensitive the camera is to light and therefore less light is required to take a picture. However, increasing your ISO setting does have its limitations: pictures taken at higher ISO settings have a grainy quality to them, that is the dots that make up the pictures are much more visible. Some photographers find this visually appealing while many do not. Other "noise" or "digital artifacts" that affect picture quality may also occur. Many cameras have a noise reduction feature that minimizes such artifacts, but it takes twice as long to save pictures when it is activated, so you have to wait even longer between shots.
Most compact cameras feature an ISO range from ISO 50 to ISO 400. Digital SLRs can go as high as ISO 1600.
Control your aperture and shutter settings
Your aperture and shutter settings determine how much light your camera sees and for how long.
The aperture is essentially the hole through which your camera sees the world. The wider it is, the more light gets through, but if too much light gets through, colour accuracy may suffer (resulting in colour shift), or excessive light can wash out everything.
Your aperture setting is called an F-stop and is designated as follows: F/2.8, F/4, F/5.6, (up to F/22 on some cameras). The higher the F-number, the smaller the aperture and the less the amount of light that can get through.
Your shutter is a door that opens and closes to let light in. The longer it stays open, the more light gets through, but your camera's ability to freeze motion is reduced.
The shutter speed is expressed as a fraction or number representing the number of seconds that the shutter is open. For example: 1/25, 1/500, 1, 1.5, 3, etc.
Your aperture setting also affects your camera's depth of field. Depth of field simply means how near and how far from your camera objects can be and still remain in focus. The narrower the aperture, the sharper objects in the background appear; but at the same time, objects in the foreground may appear blurry, because you have to keep your shutter open longer to capture enough light to take the picture.
As you can see, controlling your aperture width and shutter speed is very much a balancing act, but it is essential to good night photography. Professional photographers use all kinds of calculations to figure out the relationship between the aperture and shutter settings. As a rule of thumb, the wider the aperture, the shorter the time the shutter stays open. Experiment with these settings in low light conditions to discover a range of photographic effects you can achieve. You'll be surprised at the difference that even a slight adjustment can make.
Many cameras have a function called aperture/shutter priority that lets you control one of the two settings while the camera adjusts the other automatically. This can take a lot of guesswork out of the process and can ensure that your camera gets enough light to take a picture, but it can't guarantee a good shot.
Use exposure compensation
The combination of the shutter speed, aperture and ISO setting is called exposure and determines the total amount of light and that your camera can capture, as well as its ability to freeze motion.
Some cameras allow you to fine tune your exposure once you have found the best settings for your camera. This is called exposure compensation. It is used to adjust for further variations in light conditions once you have found the optimum settings for your camera in a given situation without having to change your overall aperture and shutter settings.
Adjust your white balance
Your camera's white balance setting is like a built-in filter that compensates for variations in colour that are created by the type of light around you. While an automatic setting is fine for daylight photography, you may want to adjust your white balance manually to better reflect your lighting conditions at night.
To set your white balance manually, point your camera toward a solid white object (such as a wall or piece of white cardboard) and press the white balance control. Some cameras allow you to further tune the white balance by adjusting the red and blue levels. Please consult your camera's manual for specific instructions.
Although the white balance setting is designed to help ensure colour accuracy, you may want to use it to do exactly the opposite. Try adjusting your white balance to create a pleasing eye-catching colours in your photographs, even if they don't correspond to the colours that you see.
Manually focus your camera
Your camera's autofocus may not work properly in low-light conditions (especially if your camera lacks a focus-assist lamp). You may want to focus manually to ensure the clearest picture.
One benefit of manual focus is that, if you're taking several shots of a single subject, you don't have to wait for your camera to automatically focus before you take the next picture. This means you can take more shots in a shorter time.
Bracket your shots
Professional photographers use a technique called bracketing to improve their chances of getting the perfect shot. Bracketing means shooting a picture at the recommended exposure then taking the same shot at the next highest and next lowest exposure in the hopes that one of the three will work well. It's a technique that is especially useful when there is too little or too much light available.
Most digital cameras have a bracketing mode that automatically adjusts the exposure level so you can take 3 to 5 shots in row to bracket a picture.
To make the most of your night photography:
Compact Cameras
A camera with a manual shutter and ISO controls. (The longer the maximum shutter time and the higher the ISO number, the better.)
Digital SLRs
A shutter release cable or remote control to prevent camera shake caused by pressing the shutter release button.
Accessories
A tripod to keep your camera steady during prolonged exposures.
Monday, August 25, 2008
Depth of Field : Sharpness of a photograph
Depth of field (DOF) is the portion of a scene that appears sharp in the image. Although a lens can precisely focus at only one distance, the decrease in sharpness is gradual on either side of the focused distance, so that within the DOF, the unsharpness is imperceptible under normal viewing conditions.
For some images, such as landscapes, a large DOF may be appropriate, while for others, such as portraits, a small DOF may be more effective.
The DOF is determined by the subject distance (that is, the distance to the plane that is perfectly in focus), the lens focal length, and the lens f-number (relative aperture). Except at close-up distances, DOF is approximately determined by the subject magnification and the lens f-number. For a given f-number, increasing the magnification, either by moving closer to the subject or using a lens of greater focal length, decreases the DOF; decreasing magnification increases DOF. For a given subject magnification, increasing the f-number (decreasing the aperture diameter) increases the DOF; decreasing f-number decreases DOF.
Thursday, August 21, 2008
Thursday, August 14, 2008
Shutter Speed
In photography, shutter speed is the length of time a shutter is open; the total exposure is proportional to this exposure time, or duration of light reaching the film or image sensor.
Factors that affect the total exposure of a photograph include the scene luminance, the aperture size (f-number), and the exposure time (shutter speed); photographers can trade off shutter speed and aperture by using units of stops. A stop up and down on each will halve or double the amount of light regulated by each; exposures of equal exposure value can be easily calculated and selected. For any given total exposure, or exposure value, a fast shutter speed requires a larger aperture (smaller f-number). Similarly, a slow shutter speed, a longer length of time, can be compensated by a smaller aperture (larger f-number).
Slow shutter speeds are often used in low light conditions, extending the time until the shutter closes, and increasing the amount of light gathered. This basic principle of photography, the exposure, is used in film and digital cameras, the image sensor effectively acting like film when exposed by the shutter.
Shutter speed is measured in seconds. A typical shutter speed for photographs taken in sunlight is 1/125th of a second. In addition to its effect on exposure, shutter speed changes the way movement appears in the picture. Very short shutter speeds are used to freeze fast-moving subjects, for example at sporting events. Very long shutter speeds are used to intentionally blur a moving subject for artistic effect.

Hight Shutter Speed

Low Shutter Speed
I shot these pics during Shrikhand Trek in Himachal Pradesh.
I shot these pics during Shrikhand Trek in Himachal Pradesh.
Thursday, June 12, 2008
What is Aperture in Cameras?
In optics, an aperture is a hole or an opening through which light is admitted. More specifically, the aperture of an optical system is the opening that determines the cone angle of a bundle of rays that come to a focus in the image plane. The aperture determines how collimated the admitted rays are, which is of great importance for the appearance at the image plane.
F-STOPS:
* F-stop: Focal length/Diameter of the selected aperture.
* F-stop: Bigger the number smaller the aperture, smaller the number bigger the aperture.
* With every opening of aperture by one full f-stop, amount of light coming in the camera becomes twice of the previous stop.
* Reducing the aperture size increases the depth of field, which describes the extent to which subject matter lying closer than or farther from the actual plane of focus appears to be in focus.
* In general, the smaller the aperture (the larger the number), the greater the distance from the plane of focus the subject matter may be while still appearing in focus.
Aperture priority is a semi-automatic shooting mode used in cameras. It allows the photographer to choose an aperture setting and allow the camera to decide the shutter speed and sometimes ISO sensitivity for the correct exposure. This is sometimes referred to as Aperture Priority Auto Exposure, A mode, Av mode, or semi-auto mode.
Prime lenses have a fixed focal length (FFL) and large aperture and are favored by professionals, especially by photojournalists who often work in dim light, have no opportunity to introduce supplementary lighting, and need to capture fast breaking events.
Zoom lenses typically have a maximum aperture (minimum f-number) of f/2.8 to f/6.3 through their range. A very fast zoom lens will be constant f/2.8 or f/2, which means the relative aperture will stay the same throughout the zoom range. A more typical consumer zoom will have a variable relative aperture, since it is harder and more expensive to keep the effective aperture proportional to focal length at long focal lengths; f/3.5 to f/5.6 is an example of a common variable aperture range in a consumer zoom lens.
The amount of light captured by a lens is proportional to the area of the aperture, equal to:
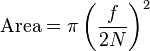
- Where f is focal length and N is the f-number.
The focal length value is not required when comparing two lenses of the same focal length; a value of 1 can be used instead, and the other factors can be dropped as well, leaving area proportion to the reciprocal square of the f-number N..
If two cameras of different format sizes and focal lengths have the same angle of view, and the same aperture area, they gather the same amount of light from the scene. The relative focal-plane illuminance, however, depends only on the f-number N, independent of the focal length, so is less in the camera with the larger format, longer focal length, and higher f-number.
Wednesday, June 11, 2008
Controlling the photographic exposure and rendering
Camera controls are inter-related. The total amount of light reaching the film plane (the "exposure") changes with the duration of exposure, aperture of the lens, and focal length of the lens (which changes as the lens is zoomed). Changing any of these controls alters the exposure. Many cameras may be set to adjust most or all of these controls automatically. This automatic functionality is useful in many situations, and in most situations to occasional photographers.
The duration of an exposure is referred to as shutter speed, often even in cameras that don't have a physical shutter, and is typically measured in fractions of a second. Aperture is expressed by an f-number or f-stop (derived from focal ratio), which is proportional to the ratio of the focal length to the diameter of the aperture. If the f-number is decreased by a factor of , the aperture diameter is increased by the same factor, and its area is increased by a factor of 2. The f-stops that might be found on a typical lens include 2.8, 4, 5.6, 8, 11, 16, 22, 32, where going up "one stop" (using lower f-stop numbers) doubles the amount of light reaching the film, and stopping down one stop halves the amount of light.
The duration of an exposure is referred to as shutter speed, often even in cameras that don't have a physical shutter, and is typically measured in fractions of a second. Aperture is expressed by an f-number or f-stop (derived from focal ratio), which is proportional to the ratio of the focal length to the diameter of the aperture. If the f-number is decreased by a factor of , the aperture diameter is increased by the same factor, and its area is increased by a factor of 2. The f-stops that might be found on a typical lens include 2.8, 4, 5.6, 8, 11, 16, 22, 32, where going up "one stop" (using lower f-stop numbers) doubles the amount of light reaching the film, and stopping down one stop halves the amount of light.
Exposures can be achieved through various combinations of shutter speed and aperture. For example, f/8 at 8 ms (=1/125th of a second) and f/5.6 at 4 ms (=1/250th of a second) yield the same amount of light. The chosen combination has an impact on the final result. In addition to the subject or camera movement that might vary depending on the shutter speed, the aperture (and focal length of the lens) determine the depth of field, which refers to the range of distances from the lens that will be in focus. For example, using a long lens and a large aperture (f/2.8, for example), a subject's eyes might be in sharp focus, but not the tip of the nose. With a smaller aperture (f/22), or a shorter lens, both the subject's eyes and nose can be in focus. With very small apertures, such as pinholes, a wide range of distance can be brought into focus.
Photographic Controls
Photographers control the camera and lens to "expose" the light recording material (such as film) to the required amount of light to form a "latent image" (on film) or "raw file" (in digital cameras) which, after appropriate processing, is converted to a usable image. Modern digital cameras replace film with an electronic image sensor based on light-sensitive electronics such as charge-coupled device (CCD) or complementary metal-oxide-semiconductor (CMOS) technology. The resulting digital image is stored electronically, but can be reproduced on paper or film.
Now we start discussing different controls in cameras which give flexibility to photographers to capture a particular view conveniently....
- Aperture of the lens
- Shutter speed
- ISO speed
- White balance
- Auto Focus Point
- Focal Length
- Filters & Scrims
.........
Now we start discussing different controls in cameras which give flexibility to photographers to capture a particular view conveniently....
- Aperture of the lens
- Shutter speed
- ISO speed
- White balance
- Auto Focus Point
- Focal Length
- Filters & Scrims
.........
Tuesday, June 10, 2008
Types of Photography ...
BLAK & WHITE PHOTOGRAPHY:
All photography was originally monochrome, or black-and-white. Even after color film was readily available, black-and-white photography continued to dominate for decades, due to its lower cost and its "classic" photographic look. It is important to note that some monochromatic pictures are not always pure blacks and whites, but also contain other hues depending on the process. The Cyanotype process produces an image of blue and white for example.
Many photographers continue to produce some monochrome images. Some full color digital images are processed using a variety of techniques to create black and whites, and some cameras have even been produced to exclusively shoot monochrome.
COLOR PHOTOGRAPHY:
Color photography was explored beginning in the mid 1800s. Early experiments in color could not fix the photograph and prevent the color from fading. The first permanent color photo was taken in 1861 by the physicist James Clerk Maxwell.
One of the early methods of taking color photos was to use three cameras. Each camera would have a color filter in front of the lens. This technique provides the photographer with the three basic channels required to recreate a color image in a darkroom or processing plant. Russian photographer Sergei Mikhailovich Prokudin-Gorskii developed another technique, with three color plates taken in quick succession.
Practical application of the technique was held back by the very limited color response of early film; however, in the early 1900s, following the work of photo-chemists such as H. W. Vogel, emulsions with adequate sensitivity to green and red light at last became available.
The first color plate, Autochrome, invented by the French Lumière brothers, reached the market in 1907. It was based on a 'screen-plate' filter made of dyed dots of potato starch, and was the only color film on the market until German Agfa introduced the similar Agfacolor in 1932. In 1935, American Kodak introduced the first modern ('integrated tri-pack') color film, Kodachrome, based on three colored emulsions. This was followed in 1936 by Agfa's Agfacolor Neue. Unlike the Kodachrome tri-pack process, the color couplers in Agfacolor Neue were integral with the emulsion layers, which greatly simplified the film processing. Most modern color films, except Kodachrome, are based on the Agfacolor Neue technology. Instant color film was introduced by Polaroid in 1963.
Color photography may form images as a positive transparency, intended for use in a slide projector or as color negatives, intended for use in creating positive color enlargements on specially coated paper. The latter is now the most common form of film (non-digital) color photography owing to the introduction of automated photoprinting equipment.
DIGITAL PHOTOGRAPHY:
Traditional photography burdened photographers working at remote locations without easy access to processing facilities, and competition from television pressured photographers to deliver images to newspapers with greater speed. Photo journalists at remote locations often carried miniature photo labs and a means of transmitting images through telephone lines. In 1981, Sony unveiled the first consumer camera to use a charge-coupled device for imaging, eliminating the need for film: the Sony Mavica. While the Mavica saved images to disk, the images were displayed on television, and the camera was not fully digital. In 1990, Kodak unveiled the DCS 100, the first commercially available digital camera. Although its high cost precluded uses other than photojournalism and professional photography, commercial digital photography was born.
Digital imaging uses an electronic image sensor to record the image as a set of electronic data rather than as chemical changes on film. The primary difference between digital and chemical photography is that chemical photography resists manipulation because it involves film and photographic paper, while digital imaging is a highly manipulative medium. This difference allows for a degree of image post-processing that is comparatively difficult in film-based photography and permits different communicative potentials and applications.
Digital point-and-shoot cameras have become widespread consumer products, outselling film cameras, and including new features such as video and audio recording. Kodak announced in January 2004 that it would no longer sell reloadable 35 mm cameras in western Europe, Canada and the United States after the end of that year. Kodak was at that time a minor player in the reloadable film cameras market. In January 2006, Nikon followed suit and announced that they will stop the production of all but two models of their film cameras: the low-end Nikon FM10, and the high-end Nikon F6. On May 25, 2006, Canon announced they will stop developing new film SLR cameras.
According to a survey made by Kodak in 2007, 75 percent of professional photographers say they will continue to use film, even though some embrace digital.
According to the U.S. survey results, more than two-thirds (68 percent) of professional photographers prefer the results of film to those of digital for certain applications including:
Because photography is popularly synonymous with truth ("The camera doesn't lie."), digital imaging has raised many ethical concerns. Many photojournalists have declared they will not crop their pictures, or are forbidden from combining elements of multiple photos to make "illustrations," passing them as real photographs. Many courts will not accept digital images as evidence because of their inherently manipulative nature. Today's technology has made picture editing relatively simple for even the novice photographer.
History of Photography
Photography is the result of combining several technical discoveries. Long before the first photographs were made, Ibn al-Haytham (Alhazen) (965–1040) invented the camera obscura and pinhole camera,[2] Albertus Magnus (1193–1280) discovered silver nitrate, and Georges Fabricius (1516–1571) discovered silver chloride. Daniel Barbaro described a diaphragm in 1568. Wilhelm Homberg described how light darkened some chemicals (photochemical effect) in 1694. The fiction book Giphantie, by French author Tiphaigne de la Roche, described what can be interpreted as photography.
Photography as a usable process goes back to the 1820s with the development of chemical photography. The first permanent photograph was an image produced in 1826 by the French inventor Nicéphore Niépce. However, the picture took eight hours to expose, so he went about trying to find a new process. Working in conjunction with Louis Daguerre, they experimented with silver compounds based on a Johann Heinrich Schultz discovery in 1724 that a silver and chalk mixture darkens when exposed to light. Niépce died in 1833, but Daguerre continued the work, eventually culminating with the development of the daguerreotype in 1837. Eventually, France agreed to pay Daguerre a pension for his formula, in exchange for his promise to announce his discovery to the world as the gift of France, which he did in 1839.
Meanwhile, Hercules Florence had already created a very similar process in 1832, naming it Photographie, and William Fox Talbot had earlier discovered another means to fix a silver process image but had kept it secret. After reading about Daguerre's invention, Talbot refined his process so that it might be fast enough to take photographs of people. By 1840, Talbot had invented the calotype process, which creates negative images. John Herschel made many contributions to the new methods. He invented the cyanotype process, now familiar as the "blueprint". He was the first to use the terms "photography", "negative" and "positive". He discovered sodium thiosulphate solution to be a solvent of silver halides in 1819, and informed Talbot and Daguerre of his discovery in 1839 that it could be used to "fix" pictures and make them permanent. He made the first glass negative in late 1839.
In March of 1851, Frederick Scott Archer published his findings in "The Chemist" on the wet plate collodion process. This became the most widely used process between 1852 and the late 1880s when the dry plate was introduced. There are three subsets to the Collodion process; the Ambrotype (positive image on glass), the Ferrotype or Tintype (positive image on metal) and the negative which was printed on Albumen or Salt paper.
Many advances in photographic glass plates and printing were made in through the nineteenth century. In 1884, George Eastman developed the technology of film to replace photographic plates, leading to the technology used by film cameras today.
Saturday, June 7, 2008
What is Photography ???
Photography is the process of recording pictures by means of capturing light on a light-sensitive medium, such as a film or electronic sensor. Light patterns reflected or emitted from objects expose a sensitive silver halide based chemical or electronic medium during a timed exposure, usually through a photographic lens in a device known as a camera that also stores the resulting information chemically or electronically. Photography has many uses for both business and pleasure. It is often the basis of advertising and in fashion print. Photography can also be viewed as a commercial and artistic endeavor.
Photography is also a good and convenient way of capuring your present for past. I love this part, because it refreshes our old memories...
The word "photography" comes from the French photographie which is based on the Greek (phos) "light" + (graphis) "stylus", "paintbrush" or (graphê) "representation by means of lines" or "drawing", together meaning "drawing with light." Traditionally, the product of photography has been called a photograph, commonly shortened to photo.
Subscribe to:
Posts (Atom)


